My Other Blog:

Visit my Dog's Blog

Introducing the DOG!

Introducing the DOG!
Whippet View's Sassy Kat.. affectionately known as Zoe

My Blog Posts

<b><i>My Blog Posts</i></b>

Nov 18, 2006

{ tis the season }

Well, Thanksgiving has "settled" with the addition of a few pounds.. constraint was the keynote on Black Friday, and Lovely as a Tree has fast become one of my favorite sets. After an enjoyable Thanksgiving Day at my house with my mom and her two Yorkshire Terriers, Chloe and Andy, Zoe and I refrained from the 6:00 a.m. madhouse of frenzied shoppers beating each other over their heads for bargains, and instead spent Friday and Saturday card making.

Stamps:
French Script Background Script, Lovely as a Tree, Riveting
Inks:
Classic Creamy Carmel - Classic Old Olive
Paper:
Natural White - Holiday Thyme - Certainly Celery
Accessories:
Perfect Layers - Stickles Iridescent White - Certainly Celery Ribbon - Circle Punches - Sponge Daubers - PopDots - Rosemary from my herb garden.
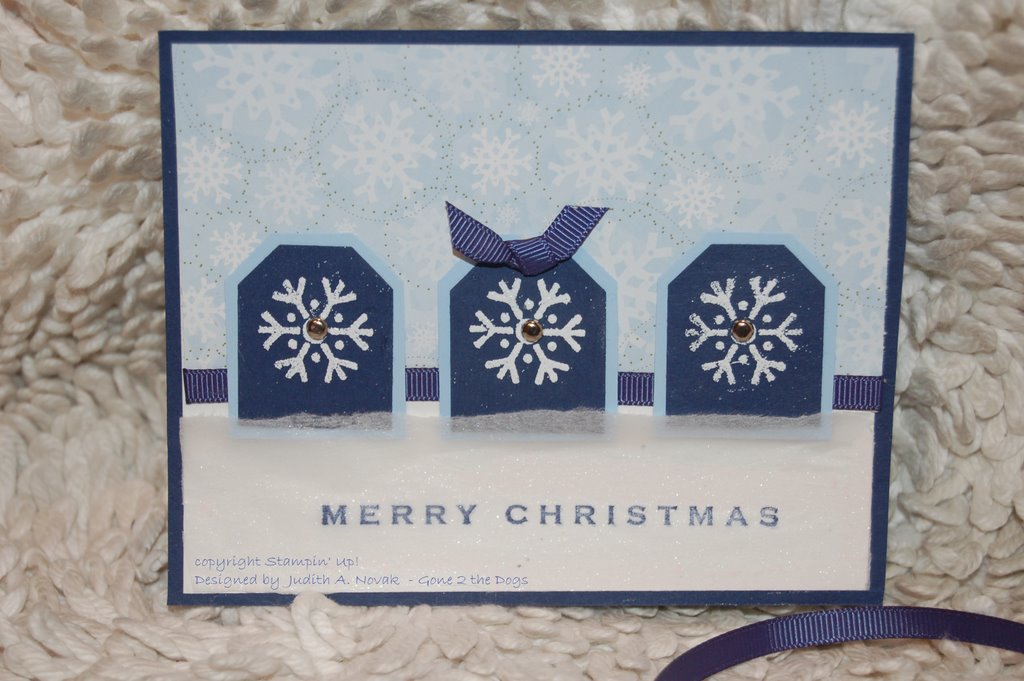


{ lovely as a tree }

I've decided that card creating and the following blogging process is like Edward Scissorhands meets The Zombie Queen. My workroom looks like a tiny tornado in progress while I'm creating (The Snap Dog thoroughly enjoys this part of the process). Mellowing insues with the camera process, and then we come to the sitting down and putting all this to words. Maybe I should try blogging first then make the card.


The edges of the French Script background layer were softened with Creamy Carmel rubbed in circular motions all along the using a sponge daubber. I wash my daubers after each use with a mild dish soap and use the same dauber for a particular colour group. The tree was inked with an Old Olive spot and then highlighted with Handsome Hunter and Chocolate Chip markers and blended with my finger. I added a swirl hodgepodge in the upper right corner of the naturals white layer which helped cover up the heavy sponging after I took the picture. It added balance to the overall project along with sucessfully masking the heaviness.

Stamps:
Canvas Background Stamp, French Script Background Script, Lovely as a Tree
Inks:
Classic Bravo Burgundy - Classic Creamy Carmel - Classic Old Olive
Paper:
Natural White - True Thyme - Bravo Burgundy
Accessories:
Perfect Layers -Antique Brass Hodgepodge - Close to Cocoa, Chocolate Chip and Handsome Hunter SU Markers - Stickles Irridescent White - True Thyme Ribbon - Ticket Corner Punch - Sponge Daubers

4 comments:

little buddy said...

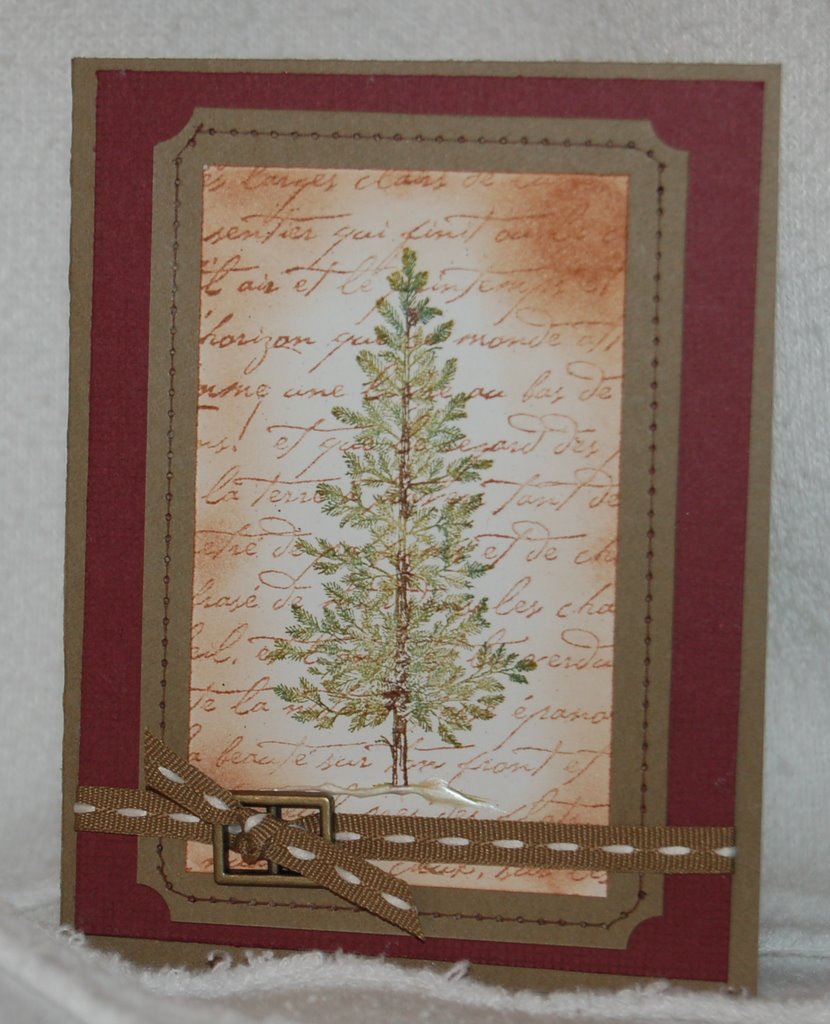
I LOVE the distressed look to the French script background. The card is one of my favorites so far! I'm looking forward to seeing more. You are an inspiration. SOMEDAY I hope to be able to use some of your great ideas in my own cards.

little buddy said...

hey...have you taken a hiatus? I came looking to see your new work! I'm looking forward to seeing more! Hope all is well with you and that beautiful whippet!

Kim Undseth said...

I love the antiqued look of this card. I also love the card above it, I think I may need this set.

Lisa said...

my favorite set is lovely as a tree. beautiful card.

Nov 16, 2006

{ class quickies }


Its that time again and with the holidays fast approaching I wanted to come up with a couple "quickie" cards my class could make. Since I've been blogging I've learned about several new products and new techniques that I wanted to pass along to my students.

On the first card, I used the Cranberry Crisp Love Notes for the card blank and found a sheet of Daisy D's cranberry gingham paper in my box of "scraps" that was big enough for first layer squares for each of my student's projects. The tree on the Marvy Uchida scallop square was coloured with watercolour pencils using using mineral spirits to spread the colour. The little paper punched holes were connected with the Going Grey Stampin' Write marker. Finally the star on top of the tree was enhanced with Scribbles Crystal Gel-Sparkles from Joann's.

On the second card, I used a handcut and scored 3"x6" Kraft blank. The smaller kraft square was distressed with the SU distressing tool and the paper punched holes were connected with a double line of Going Grey. The tiny gold bow is SU cord. The stamp at the bottom of the card is from the Small Script set. The tree and ornament stamps are $1. from Michael's.

Watercolour pencil and mineral spirits is a technique my students have not used and I believe they will enjoy the results ans well as the scallop punch. A quick, clean and simple set of cards that can be used on packages. As an extra touch reproduce one of the stamped elements on the envelope. Time to get back to get back to Christmas present projects before I head out for work.

{ friends & family }

What a Joy it is to look in and see posts from my family and friends. Krista, thank you and i'm happy to provide any inspiration. Mom.. I need to show you how to post!! Buddy, I look forward to working on my blog with you there over my Christmas Holidays with you. Now if you can only promise Snow!

Nov 12, 2006

{ senior center make & take class }

During the week I work part time as the Activities Director for our local Senior Center. A group of nearly 500 active individuals ranging in age from 50 to 96. They are a diverse group who's interests range from Tai Chi and Fantasy Finance to Darts and Creative Cardmaking. And yes, I teach the cardmaking making class along with my other responsibilities. My class has been meeting once a week for several months now, and each week I plan and present and walk them through the making of a card designed to incorporate different techniques and new products. Of course, this week I will be highlighting my new square scallop punch.

Stamps:
Paisley Background Stamp, Think Big, All Year Cheer I
Inks:
Classic
Bashful Blue - Classic Chocolate Chip - Classic Vintage Violet
Paper:
Whisper White - Bashful Blue - Kraft - Designer Series Holiday Thyme
Accessories:
Perfect Layers - Stamp-a-ma-jig - White Gel Pen - Ribbon from Michael's

Nov 10, 2006

{ just a little punchie }

My SU tag punch has been a favorite since it came out. I could hardly wait until for the new small tag punch to arrive. The perfect compliment and oh so much easier to stack! It came today and provided the perfect excuse to sit down spend a Friday off doing what I enjoy most.. making cards!

Stamps:
Perennial Favorites - Glad Tidings
Inks:
Craft Whisper White - Classic Night of Navy - Versamark Watermark
Paper:
Whisper White - Night of Navy - Bashful Blue - Designer Series Holiday Thyme
Accessories:
Perfect Layers - Ribbon Grosgrain Marine - White Embossing Powder -
Hodgepodge Hardware Silver - Frosted Tissue Paper

I wonder if someone makes a scalloped tag punch?

Nov 9, 2006

{dog paddling }


My introduction to this blog and group of bloggers occured while I was searching for a large scallop punch. I found what I was looking for along with a suggestion where I could purchase it. The examples on the blogs I looked at by way of an intricate chain of links were absolutely incredible. I wanted to become a small part of it.

My first small project posting is in recognition to the person.. her blog and my eventual involvement. Thank you, Taylor!

Both cards are 3"x3" and fit nicely into the mini square SU envelopes. Stamps sets used in the "be merry"card are Loads of Love, Hung Up on the Holidays and Warm Words. I used Riveting and Flannel Plaid to create "happy holidays". The punch a Marvy Uchida Giga Scalloped Square Craft Punch and measures approximately 2 1/4" across and 3" diagonally. I like the punch so much I've ordered both the scallop circle and the scallop oval punches and plan on using this format for all my gift enclosures over the holidays!

Now I need to figure out how to get the subscribe element on my blog and let other stampers know I'M HERE!!

Nov 8, 2006

{ time to take the plunge )

I'm new to this whole blogging concept and have spent hours trying to figure out the technical aspects. How to get stuff on the page, where to place it and how to alter the HTML so I'm not quite so generic. I think I could spend months trying to get it all just right and never pick up a stamp, a piece of paper, or a stamp pad, let alone a camera to document my final product. so.......... its time to take the BIG PLUNGE!